Identity Provider instructions
Note:
If your identity provider is not listed in this guide the instructions below will be very similar. For questions or assistance with the listed solutions or any others please contact help@livingsecurity.com
Getting Started
Azure Active Directory
- Login to your Azure environment (portal.azure.com) as an administrator and select to Azure Active Directory.
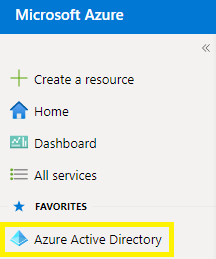
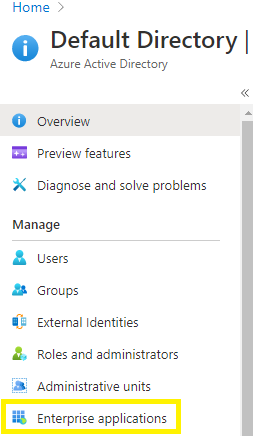
- Now click Enterprise Applications in the left-hand menu.
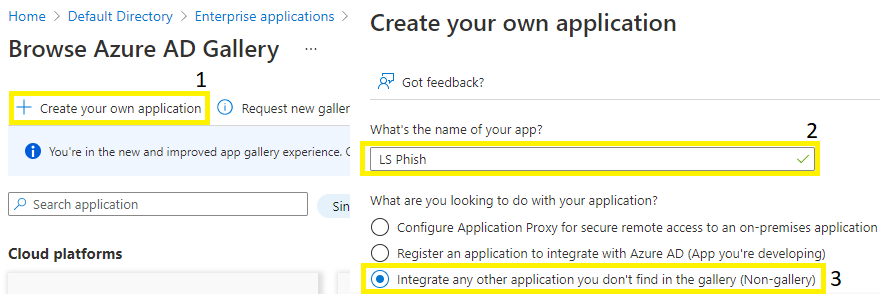
- Click New Application.

- Click Create your own application, name it appropriately in the slide out menu that appears, then select the bubble for Non-gallery and click Save.
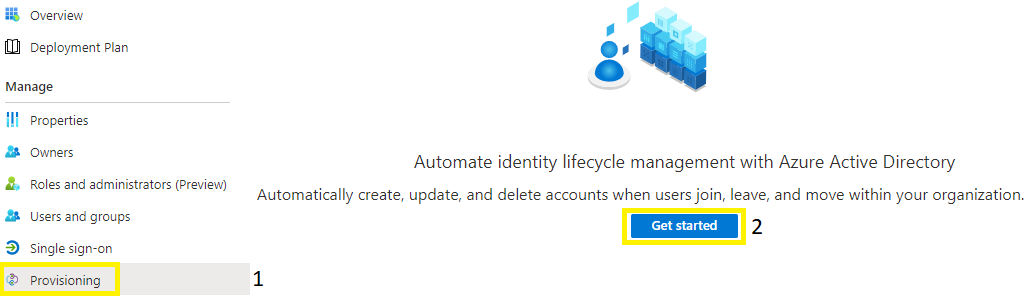
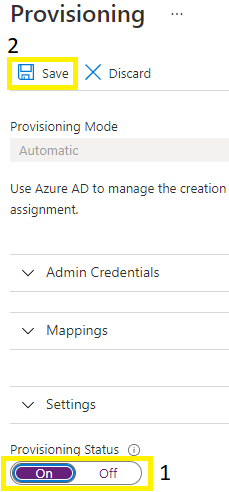
- After the application is added select Provisioning in the left-hand menu, the click Get started.
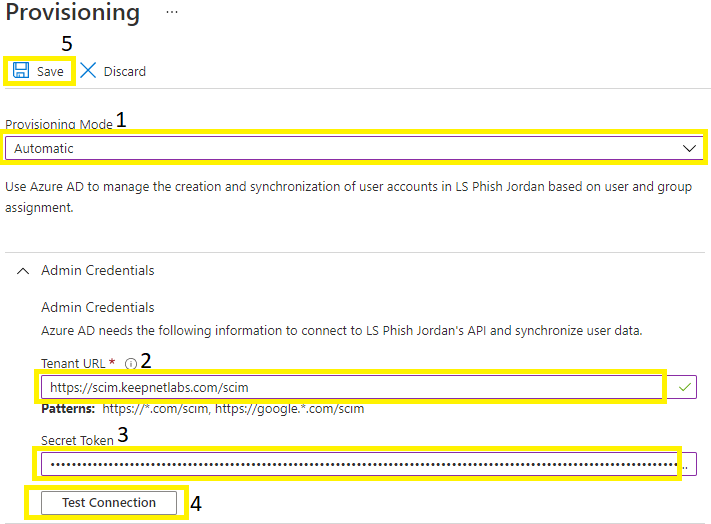
- In the Provisioning Mode dropdown select Automatic, enter the SCIM URL of https://scim-api.keepnetlabs.com/scim, your secret token, then click Test Connection. After observing a successful test click Save.
Okta
1. Please log in to https://www.okta.com/ as an admin user.
2. Click on Applications and go to Applications from the left menu.
3. Click on the Browse App Catalog and search SCIM 2.0 Test App (OAuth Bearer Token) and then click Add button.
4. Enter a name for the application like My SCIM Integration and click on the Next button.
5. Choose SAML 2.0 with the default settings and click on the Done button.
6. The application is now created successfully, go to the Provision menu and click the Configure API Integration button and then enable the API Integration option.
- 1. Tenant URL: Enter the SCIM endpoint URL https://scim-api.keepnetlabs.com/scim
- 2. Secret Token: Enter the token which was created on the platform. Click here for more information.
- 3. Click the ‘Test API Credentials’ button to test your configuration. If it’s successful, click the Save button to save settings.
- 4. While on the Provisioning menu, go to the ‘To App’ menu and click the Edit button to enable the following fields. Please make sure to click the Save button after enabling the following fields.
-
-
1. Create Users
-
2. Update User Attributes
-
3. Deactivate Users.
-
-
