- Requirements
- Configuring Provisioning
- Attribute Mapping
  - Mapping Manager
- Assigning Users and Groups
- Starting Provisioning
Requirements
- Cloud application administrator role or higher in Azure Active Directory
- SCIM support enabled by a customer support representative (help@livingsecurity.com).
- A Custom Non-Gallery Application created by following these steps.
Note: Group-based assignment requires Azure Active Directory Premium P1 or P2 licensing. See here for more details.
Configuring Provisioning
- Click Provisioning, then Get Started.

- Use the dropdown box to select Automatic, enter the Tenant URL of https://platform.api.livingsecurity.com/users/scim and your secret API token. Finally, click Test Connection and observe the successful test. Now click Save.

- After saving your configuration the Mappings section becomes available. Azure offers both user and group object mapping. For the Living Security application, we'll be mapping user objects. Expand Mappings and then click Provision Azure Active Directory Users.

Attribute Mapping
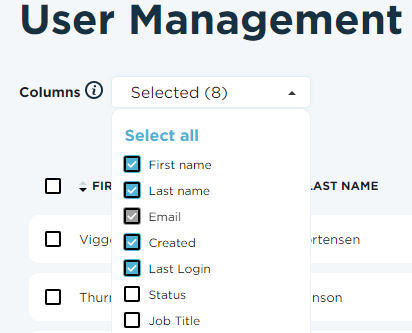
In the new pane accept the default actions of create, update, and delete. The Living Security application requires the user's email address be mapped to userName. This is usually the mail attribute but could also be the UPN depending on how your directory is structured. Please refer to the image below for a valid mapping example. See here for supported and mandatory attributes. Alternatively, checking the Columns dropdown in your LS user management dashboard can be insightful when making mapping decisions.
While not required, Scoping is a helpful feature to set up additional criteria to include or exclude users for provisioning. Please note that if mapping roles, the mapping cannot be directly mapped, it must be mapped via expression.

Mapping Manager
The manager field is a complex field and will require extra steps to ensure they are mapped correctly:
- At the bottom of the attribute mappings table, Check box for Show advanced options
- Click Edit attribute list for customappsso
- Find the attribute named urn:ietf:params:scim:schemas:extension:enterprise:2.0:User:manager
- Next to this attribute, drop the Type down from String to Reference
- In the Referenced Object Attribute column, select the value urn:ietf:params:scim:schemas:extension:enterprise:2.0:User.emails[type eq "work"].value
- Save
Now, click Add New Mapping and choose the following options:
- Source Attribute: Manager
- Target Attribute: urn:ietf:params:scim:schemas:extension:enterprise:2.0:User:manager
- Assume defaults for the rest
Assigning Users and Groups
- Now is the time to add users or groups to the application. Navigate back to the main dashboard of the application you created, select Users and groups then Add user/group to begin adding objects to be provisioned.
Starting Provisioning
- Once you are satisfied with the users and/or groups you've added to the application, click Provisioning in the left menu and then Start Provisioning.
- Once the Provisioning cycle is complete navigate to your LS user management dashboard and observe that the users have come in correctly with the attributes of your choosing.
