 Overview
In this article, we will be addressing step 2 of creating a Web Application in PingOne for linking your Identity Provider service to your Living Security Application. It is recommended that you ensure you complete the previous article’s step that can be found here.
🛂 Before we begin, please ensure you have access to your Training Platform’s SAML SSO Configuration tab. In order for PingOne SAML SSO to be configured, you will need the Service Provider Entity ID, the Assertion Consumer Service URL and the optional Service Provider Sign Out URL.
 Steps to Follow

-
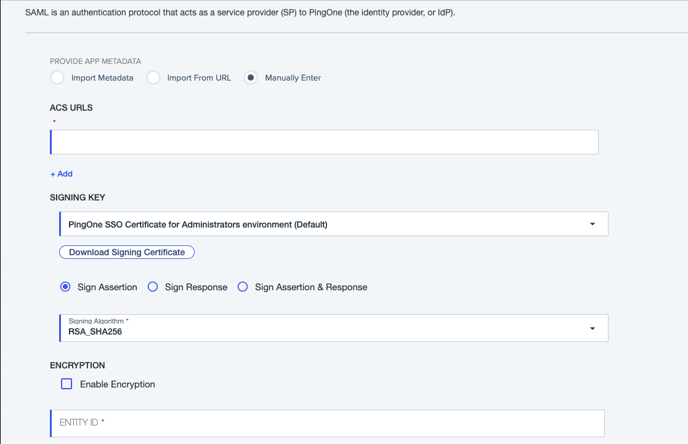
Proceed to the second step of the application creation process
-
Insert the Assertion Consumer Service URL in the ACS URLS field
-
Insert the Service Provider Entity ID in the Entity ID Field
-
You will need to apply an Assertion Validity Duration, if your organization does not have a set policy for this field, the recommended default value is 60 seconds.
-
Select [Save and Continue]
Congratulations! You should now be able to wrap up your PingOne application creation and SAML SSO Configuration! Please see next steps and related articles to complete your integration based on the functionality you desire!
