 Overview
Living Security utilizes a SAML 2.0 Connection, which relies on OIDC/OAuth 2.0 protocol for the Authentication via your Identity Management Service.
Living Security's SAML SSO Configuration can utilize Your Identity Management service’s Application Metadata URL to seamlessly integrate your Enterprise Application with a Service Provider’s application. Living Security has implemented support for using your application’s federated IDP Metadata URL to connect your environment with Training Platform. However, there are a few steps and values you will need on hand to help get your environment configured.
⚠️ In order to use Microsoft Active Directory's SAML functionality for Living Security products, you will need to have an Azure Premium P1 License, as a custom non-gallery application will need to be created.
✅ Steps to Follow
ℹ️ Before we begin, please ensure you have access to your Training Platform’s SAML SSO Configuration tab as a Company Administrator. In order for Azure SAML SSO to be configured, you will need the Service Provider Entity ID, the Assertion Consumer Service URL and the optional Service Provider Sign Out URL.
-
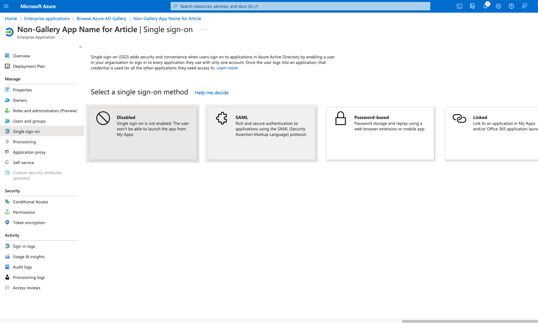
Proceed to the Single Sign-on tab in your Enterprise Application in Azure.
-
Select [SAML] to begin configuring for Single Sign-on

-
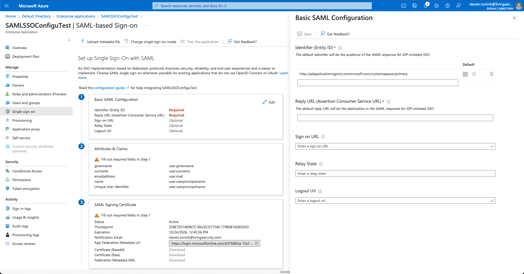
Select [Edit] in Section 1: Basic SAML Configuration
-
Paste the Service Provider Entity ID in the Identifier field
-
Paste the Assertion Consumer Service URL in the Reply URL Field
-
Optional: Paste the Service Provider Sign Out URL in the Logout URL field.

-
-
Select [Save] once these fields are completed.
Congratulations! Your Azure Enterprise Application has been configured for SAML Single Sign-on! We may now proceed to the next step of configuring your Training Platform SAML SSO Configuration Tab, which you may find below.
