Campaign Reports can be found in two ways. First, select Phishing Simulator > Campaign Manager from the left-hand menu. Then, click the blue Instance bubble next to the desired campaign and select View Report under the Actions column. Alternatively, from the Dashboard, scroll down to your Recent Campaigns, and click the desired campaign name.
Method 1:

Method 2:

Within the detailed Report, Admins will have the following tabs to go through:
- Summary
- Opened
- Clicked
- Submitted Data
- No Response
- Reporters
- Sending Report
In the Summary Section, Admins can see a quick glance at the report. For instance, you will be able to see a quick tally count of users who clicked in 4 out of 5 categories:
- No Response
- Opened Email
- Clicked Link
- Submitted Data

Below this section, you will get a quick snapshot of the Campaign Info, Email Delivery, and Email/Landing Page template used.
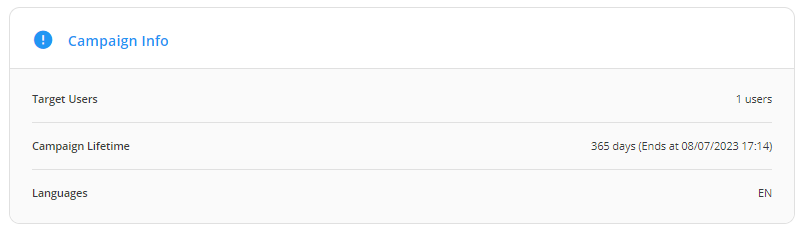
In the Campaign Info card, you will see how many Users were Target, the lifetime of the campaign, and what language the Campaign was in.
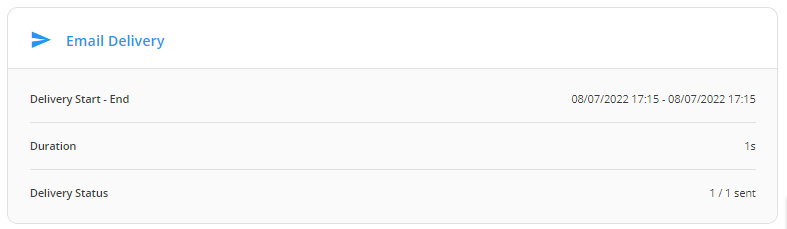
In Email Delivery, you can view when the email delivery started/ended, the duration, as well as delivery status. This is helpful to Admins in making sure all emails have been sent out, and if they haven't, check if the Campaign end date has been reached or click on the Sending Report tab to further investigate.
Towards the bottom of the summary page, Admins can preview the Email or Landing Page template that was a part of the Campaign. This is especially helpful if it has been a few weeks since launch and have a quick reference.
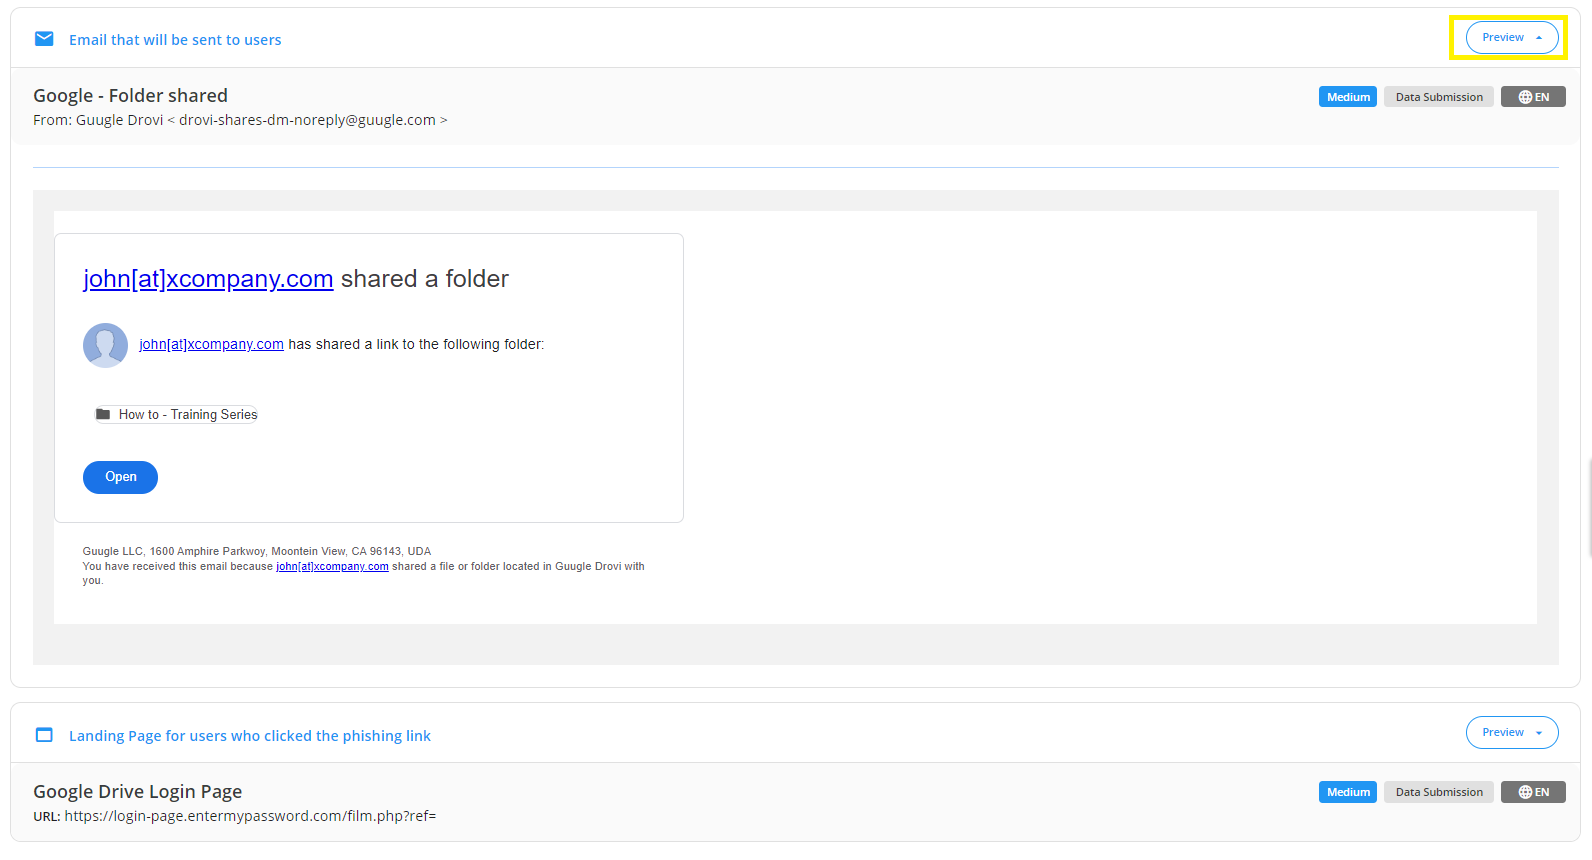
You'll also be able to see the difficulty of the template, which of the 3 types of template it is (click only, data submission, attachment download), and what language the template is in.
If you are needing to take a closer look at who opened, clicked, submitted data, or reported the Phish, you can head over to that specific tab. For instance, if an Admin wants to check who opened the Phish, they can head over to the Opened tab for a list of all target users who clicked.
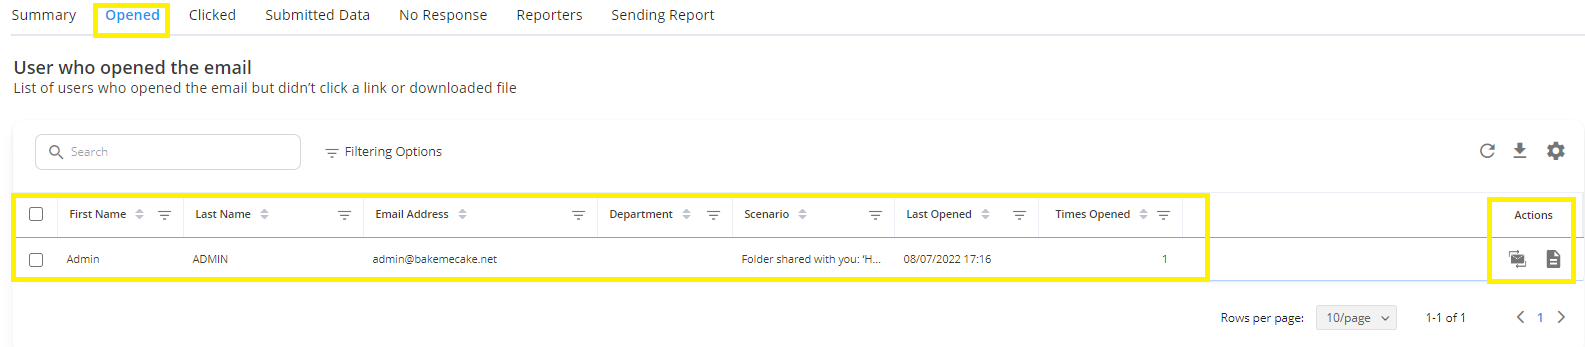
This is especially useful to then be able to either create a new Target Group of your repeated clickers or data submitters. Also, in the actions column, Admins can quickly resend that Phishing Scenario to a specific target user again.
The same applies to the other tabs as well. Admins can view a list of users that did the action of that corresponding tab. Whether it was opening the email, clicking on a link/attachment, submitting data/credentials, or reporting a Phish successfully that was a part of the Campaign.
However, the Sending Report tab is best used in the event an Admin notices a Target User has not received an email. Going to the sending report tab will give more insight to the Admin on why that email has not reached the Target User. 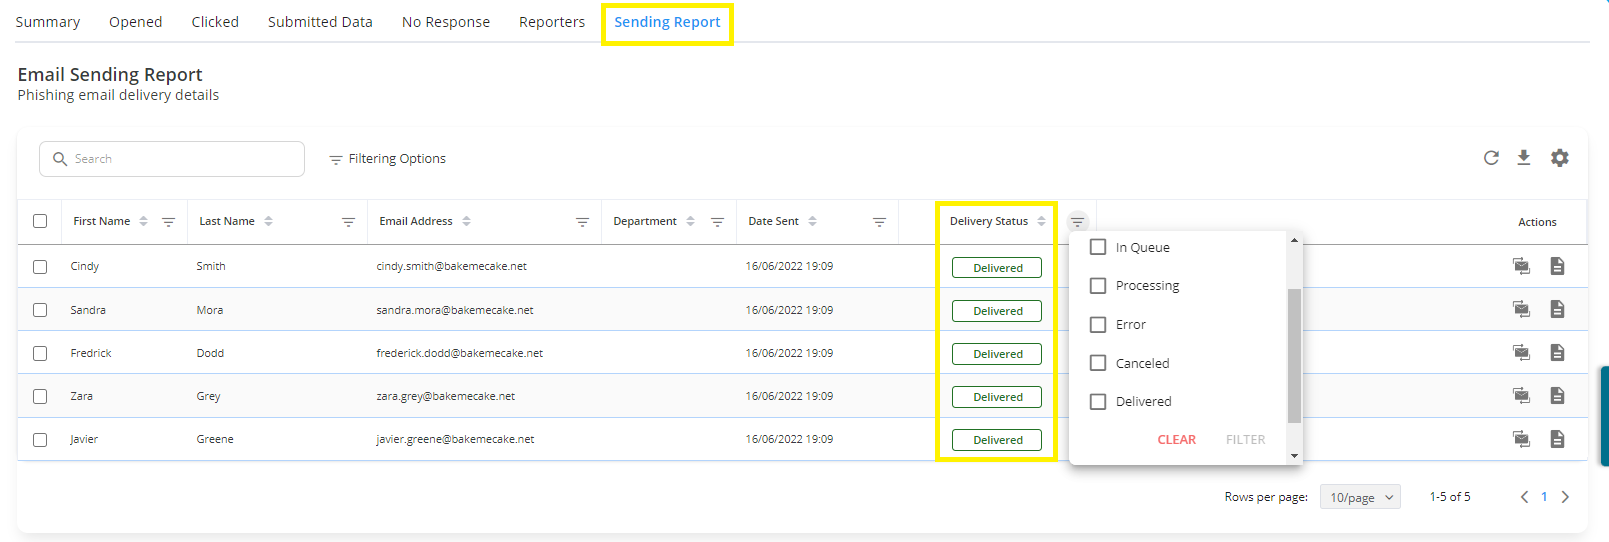
Ultimately, the Reports section is vital in showing the Phishing cyber hygiene of an organization. Based on the reports, Admins can further roll out/assess their Phishing Remediation Training and send out more simulations at different intervals as needed and view progress.
Recommended next Steps➡️:
- Go To Next Section: Target Users
- Return to Overview: Phishing
